Note: if you haven’t already read part 1 of the series, I encourage you to quickly read through it before diving into this one. We will be expanding on the example from the article so it helps if you’re at least a little bit familiar with it.
Sharing Code
In the previous article, we learned about the purpose of PE files. One of the things we recognized was that a lot of code is reused between applications; so it makes sense to store that code on disk only once and reference it in each application that uses it. We call these imports because the operating system’s program loader imports a reference to the code for your program to use. (There are also exports, which serve the opposite purpose, but we will be learning about those in a future article.)
Calling Code
Before we can understand how imports are implemented, we need a very quick refresher on how functions are called at the assembly level. Let’s consider the following C snippet:
int div(int a, int b)
{
    return a / b;
}

int s = div(4, 2);
The compiler will take this and emit something like the following assembly (output is x86 from MSVC++ 2022):
_div:
    push    ebp
    mov     ebp, esp
    mov     eax, [ebp+8]
    cdq
    idiv    dword [ebp+12]
    pop     ebp
    ret

push    2
push    4
call    _div
add     esp, 8
mov     dword [ebp-4], eax
Notice that the parameters are pushed onto the stack from right to left. Therefore, the top of the stack contains the last item pushed. The body of the function can use the ebp register with offsets to reference the parameters. Also notice that the caller removes the items that it pushed onto the stack (add esp, 8).
The way that a function is called is referred to as its calling convention. The example above uses the cdecl calling convention. As you might have guessed, there are other calling conventions. The other one we will look at is stdcall, which is used by the Windows API. In stdcall, the parameters are pushed in the same way as cdecl but the callee is responsible for removing the parameters from the stack. Take a look at how the assembly output changes for stdcall:
_div@8:
    push    ebp
    mov     ebp, esp
    mov     eax, [ebp+8]
    cdq
    idiv    dword [ebp+12]
    pop     ebp
    ret     8

push    2
push    4
call    _div@8
mov     dword [ebp-4], eax
A couple of interesting things happened. Firstly, the name changed from _div to _div@8. The name doesn’t have any effect on the execution of the program but it helpfully denotes the number of bytes that the parameters require on the stack. Secondly, the ret instruction now includes a value. This indicates the number of bytes to add to the stack pointer (esp) so that the caller doesn’t have to take care of cleaning up the parameters.
The Import Table
Now that we understand how functions are called, let’s modify our example from the last article in the series. Instead of simply setting the exit code to 42 and quitting, let’s have it display a message box onscreen. In order to do this, we will use the Windows API function MessageBoxA. It is exported in User32.dll and takes four parameters:
int MessageBoxA(
  HWND   hWnd,
  LPCSTR lpText,
  LPCSTR lpCaption,
  UINT   uType
);
The first parameter will be NULL (a pointer with a value of 0), the second and third will be a pointer to a NULL-terminated string, and the fourth will be 0x40, which corresponds with the value MB_ICONINFORMATION.
But wait — what are we passing to the call instruction? The MessageBoxA function is not defined in our application. How do we tell the program loader that our application needs this function and how does the program loader tell us where this function is located?
Enter the import table.
Recall the data directories from the previous article. We wrote 16 blank entries in our example but now we are going to use one of them. The first entry is the export table, which we will look at in another article, so we will write a blank entry for that. Next, we will write the virtual address and size of the import table followed by 14 blank entries:
dd 0, 0
dd idata
dd idatasize
times 14 dd 0, 0
.idata Section Header
We will also need to add another section to the file - .idata. When adding the section header, we need to specify a couple of things about how this section will get loaded into memory:
- The section contains initialized data (
IMAGE_SCN_CNT_INITIALIZED_DATA). - The section should provide both read and write access (
IMAGE_SCN_MEM_READandIMAGE_SCN_MEM_WRITE).
To add this section to the example, we will begin by changing the value for NumberOfSections in the file header from 1 to 2. We will also change SizeOfInitializedData from 0 to idatasize.
Next, we will add another section header immediately after the .text one:
; .idata section
    db ".idata", 0, 0   ; Name
    dd idatasize        ; VirtualSize
    dd idata            ; VirtualAddress
    dd idatasize        ; SizeOfRawData
    dd idata            ; PointerToRawData
    dd 0                ; PointerToRelocations
    dd 0                ; PointerToLinenumbers
    dw 0                ; NumberOfRelocations
    dw 0                ; NumberOfLinenumbers
    dd 0xC0000040       ; Characteristics
The header looks very similar to the one for the .text section, so there’s no need to step through all of the fields.
.idata Section
Now that we’ve defined the section header, let’s add the section to the file. In our example, immediately after the code section (right after the line beginning with codesize), we will add the following:
align 4

idata:

; User32.dll
    dd 0          ; OriginalFirstThunk
    dd 0          ; TimeDateStamp
    dd 0          ; ForwarderChain
    dd user32     ; Name
    dd user32_iat ; FirstThunk

; Blank import descriptor

    times 5 dd 0

; Import lookup and address tables

user32:
    db "USER32.DLL", 0

user32_iat:
    MessageBoxA dd user32_iat_MessageBoxA
    dd 0

user32_iat_MessageBoxA:
    dw 0
    db "MessageBoxA", 0

messageTitle db "Message", 0
messageText  db "Hello from the PE file!", 0

idatasize equ $ - idata
A lot is happening here, so let’s break it down. The first thing we find in the .idata section is an array of import descriptors (IMAGE_IMPORT_DESCRIPTOR). The first three fields of each entry aren’t relevant to what we’re looking at today, so we’ll skip over them. As for the rest:
Name— the address of a string containing the name of the image (DLL file) that this entry will importFirstThunk— the address of the Import Address Table (IAT)
The program loader knows it has reached the last import descriptor when it comes across one that is entirely blank (all zeroes). Next, we provide a NULL terminated string specifying the DLL we are trying to load (USER32.Dll).
The IAT requires a bit of explanation since it is used both for specifying what we want to import and storing pointers to the functions once they are imported.
Each entry consists of a DWORD that initially points to an address that specifies the function to load (either by ordinal or by name). However, after being loaded into memory, the program loader will replace this DWORD with a pointer to the function.
Checking with a Debugger
Let’s take what we’ve got so far and compile it into an executable. The example doesn’t actually use the imported function yet but we can still watch how the function is imported by loading it into a debugger. We will use WinDbg for this purpose.
-
Begin by launching the program, clicking File, and selecting “Launch Executable”. Select the compiled example program.
-
This will begin a debugging session, load the executable, and stop immediately before executing the application:
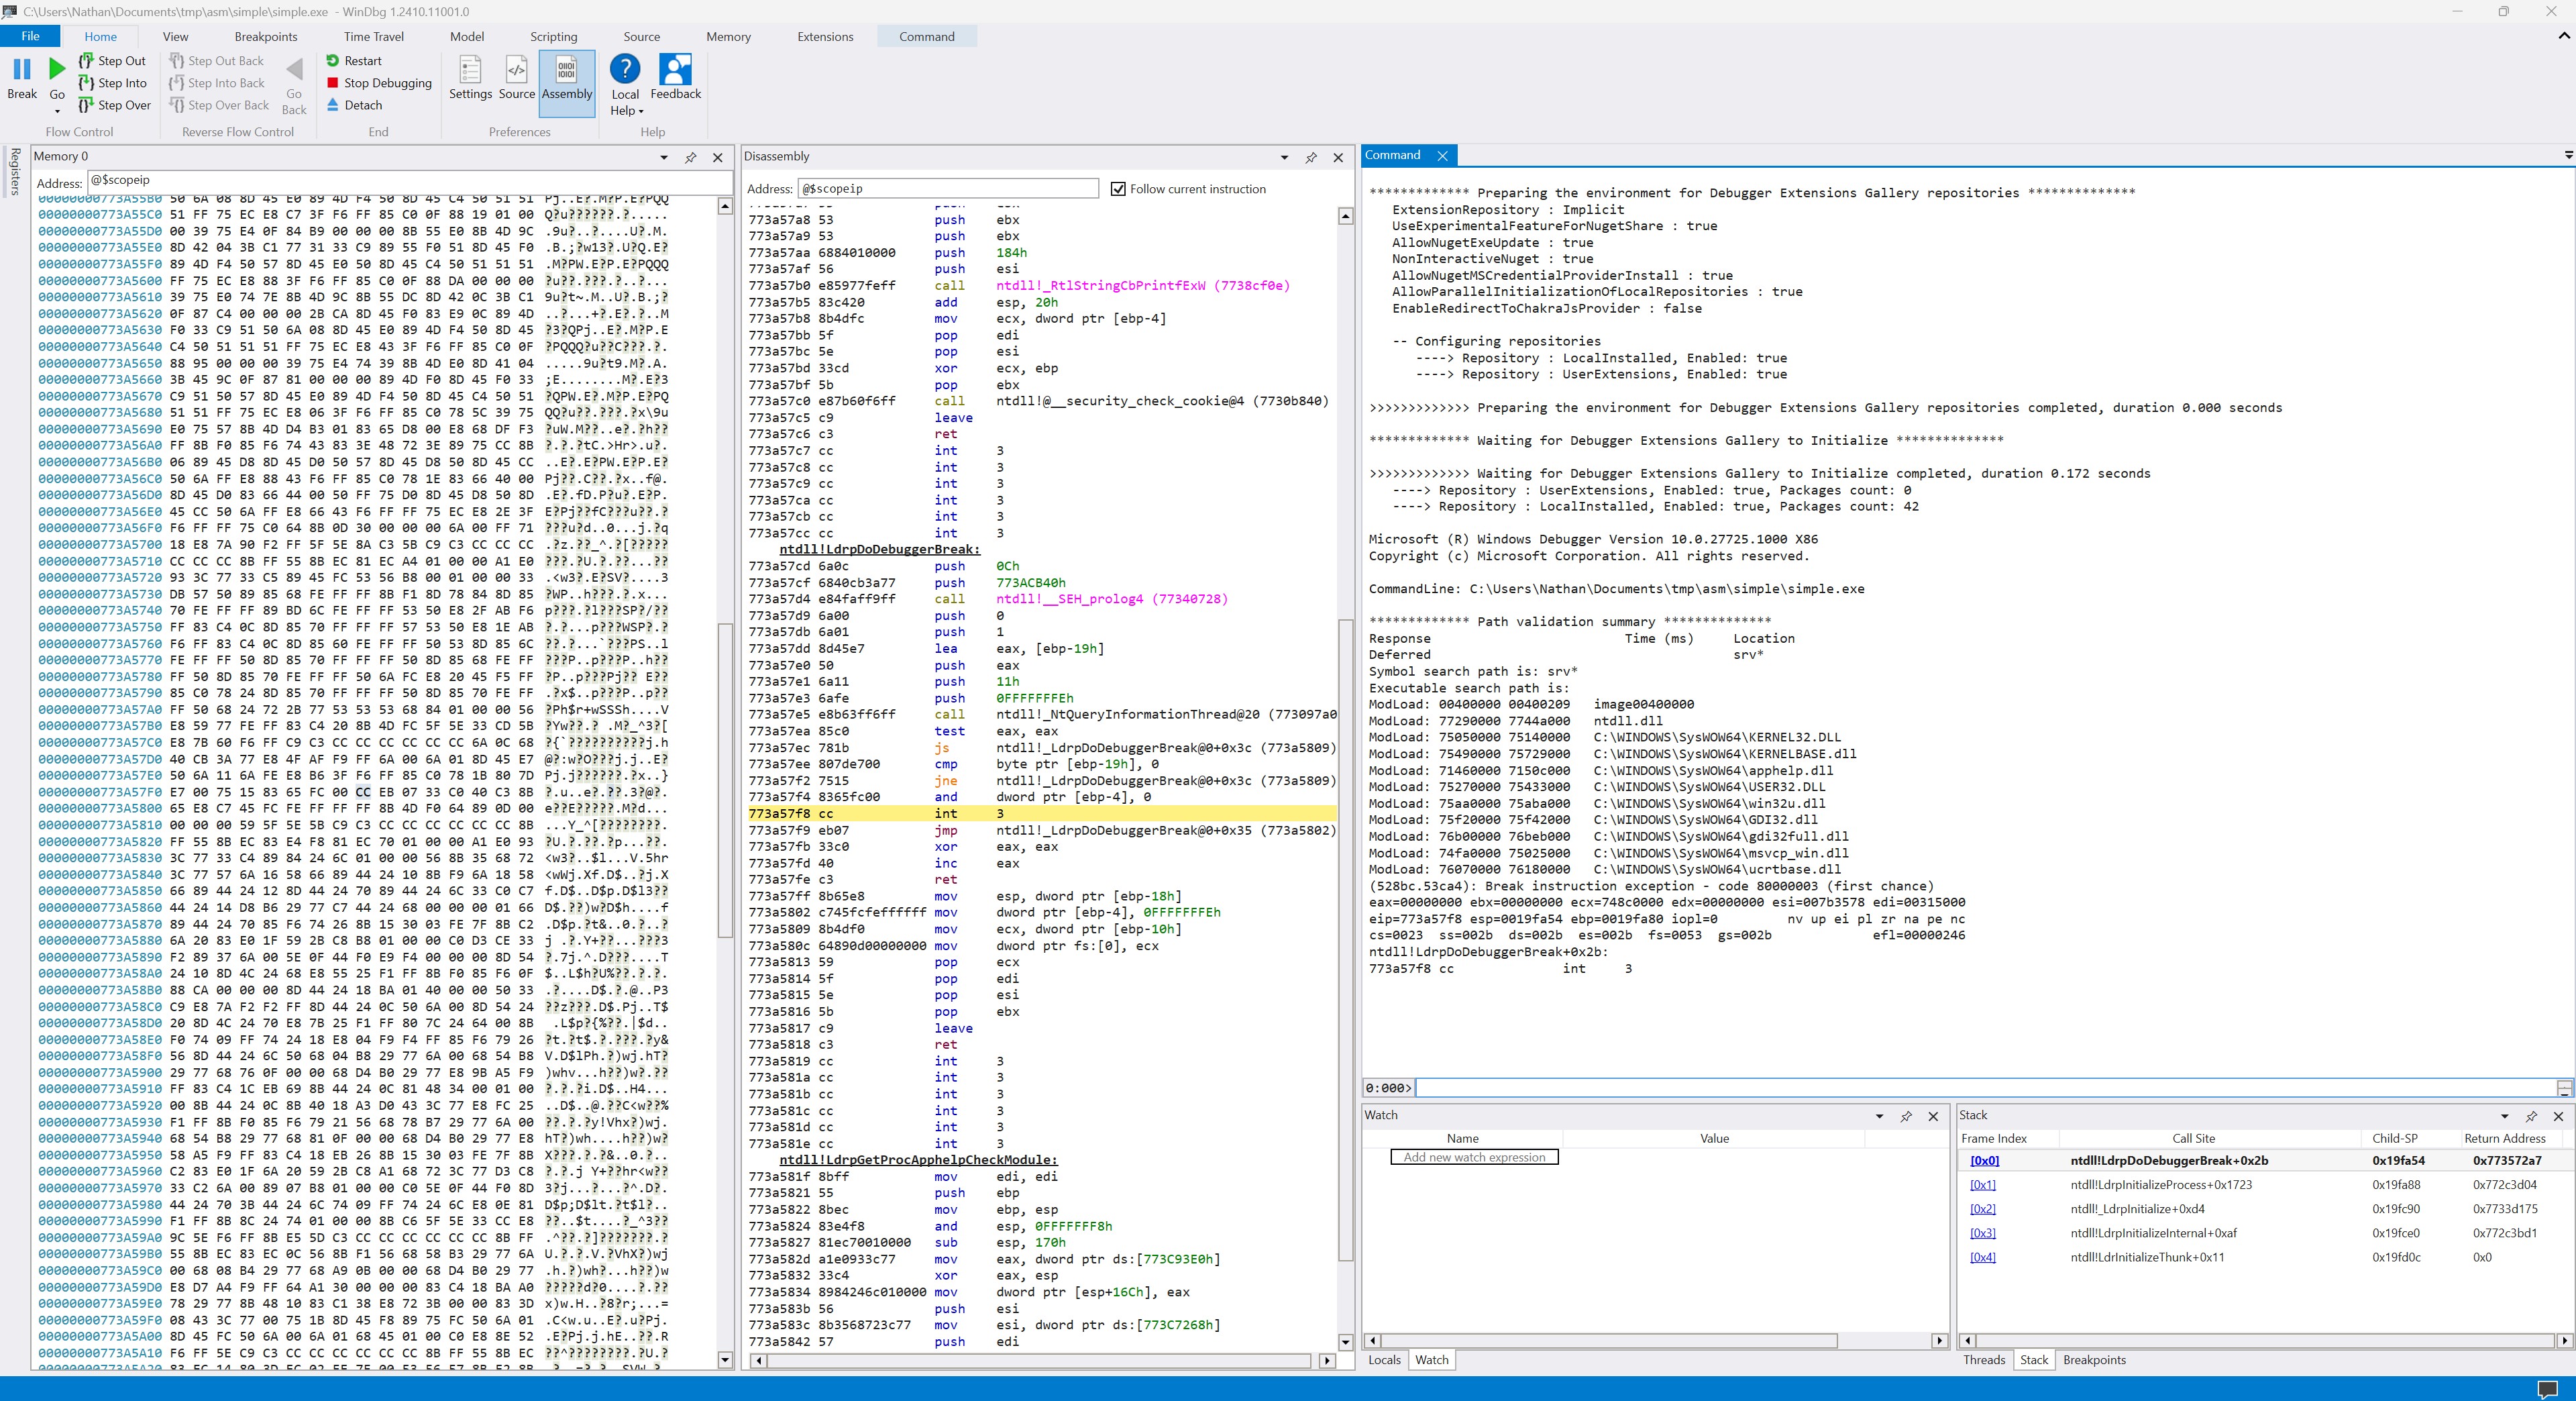
The left panel displays the contents of memory (by address), the center panel shows disassembled assembly (with the current breakpoint highlighted), and the right panel shows output and gives us a place to enter commands.
-
We want to jump to the point in memory where our executable is loaded. Remember
ImageBase? We defined that to be0x400000, so we can inspect the memory at that address using:> d 0x400000 00400000 4d 5a 00 00 00 00 00 00-00 00 00 00 00 00 00 00 MZ.............. 00400010 00 00 00 00 00 00 00 00-00 00 00 00 00 00 00 00 ................ 00400020 00 00 00 00 00 00 00 00-00 00 00 00 00 00 00 00 ................ 00400030 00 00 00 00 00 00 00 00-00 00 00 00 40 00 00 00 ............@... 00400040 50 45 00 00 4c 01 02 00-00 00 00 00 00 00 00 00 PE..L........... 00400050 00 00 00 00 e0 00 03 01-0b 01 00 00 17 00 00 00 ................ 00400060 69 00 00 00 00 00 00 00-88 01 00 00 88 01 00 00 i............... 00400070 00 00 00 00 00 00 40 00-01 00 00 00 01 00 00 00 ......@.........Look! We can immediately spot the
MZthat signifies the beginning of the file. -
As useful as the
dcommand is, it’s going to be easier to use the memory panel for our purposes (since we can see much larger regions at a time), so let’s instead enter the address there: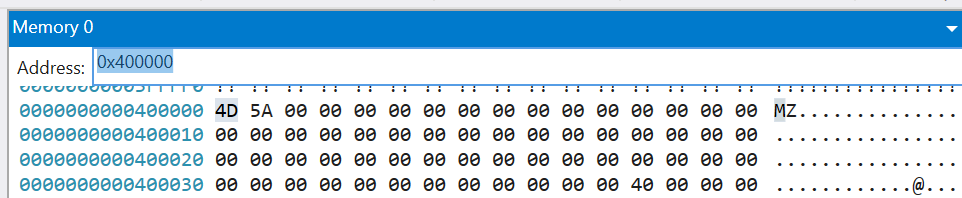
-
How do we find the
.idatasection? We can use the following command and do a bit of math:> !dh -s 0x400000 ... SECTION HEADER #2 .idata name 69 virtual size 1A0 virtual address 69 size of raw data 1A0 file pointer to raw data 0 file pointer to relocation table 0 file pointer to line numbers 0 number of relocations 0 number of line numbers C0000040 flags Initialized Data (no align specified) Read WriteWe can see that the
.idatasection begins at offset0x1a0. So all we need to do is add this to theImageBaseand now we know where to look in the memory panel:0x4001a0:
-
If we carefully step through the individual bytes, we discover that the address for
MessageBoxAis stored at0x4001d3and its value is0x714ddf40(remember x86 platforms are little-endian, meaning the least-significant byte is first). You can paste this address into the Disassembly panel to see the assembly for it:
(For those curious as to why the address leads to
SrHook_MessageBoxAinapphelp, it turns out that Windows uses a compatibility shimapphelp.dllto invokeMessageBoxAon behalf of your application.)
Now that we know the program loader is finding and loading our imports, let’s use them!
Calling the Imported Function
Replace the code section in the example with the following assembly.
code:
    push    0x40
    push    ImageBase + messageTitle
    push    ImageBase + messageText
    push    0
    call    [ImageBase + MessageBoxA]
    xor     eax, eax
    ret
Here we simply push the parameters onto the stack (from right to left) and invoke MessageBoxA using the address pointed to at [ImageBase + MessageBoxA]. Then we are setting the return value to 0 and exiting the application.
Let’s try running it:
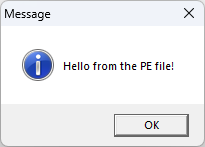
It works!
Conclusion
Just for fun, let’s see how much we’ve saved by doing this ourselves. Consider the following (equivalent) C program:
#include <Windows.h>

void main()
{
    MessageBoxA(NULL, "Hello from the PE file!", "Message", MB_ICONINFORMATION);
}
We can compile it in MSVC using:
cl simple.c /link user32.lib
If we look at the resulting executable, we discover that it is 86,016 bytes! Naturally, a lot of this extra space is due to the C runtime, so let’s compile it again without it included:
cl simple.c /link /nodefaultlib /entry:main /subsystem:windows user32.lib
Ah, there we go. Now we’re down to 3,072 bytes. But how much space does our hand-written executable occupy? Turns out that we have reduced the executable down to 521 bytes!